
Phonebook app in Vue

Introduction#

In this tutorial we are going to make simple phonebook app. We want our users to be able to create, update, list and delete contacts. We will demonstrate that using Architect SDK as a backend service we are able to make complete app (although simple) in no time. By delegating all backend logic to Architect SDK we can fully focus on making UI and let Architect SDK handle the rest.

Setup#

We will use vite for initial setup of our project. Open your terminal and enter following code:

npm init vite@latest phonebook-app -- --template vue-ts

You will be prompted to install create-vite@latest. Press y. Everything should install now. After installation has finished inside your terminal type these three commands:

cd phonebook-app
npm install
npm run dev

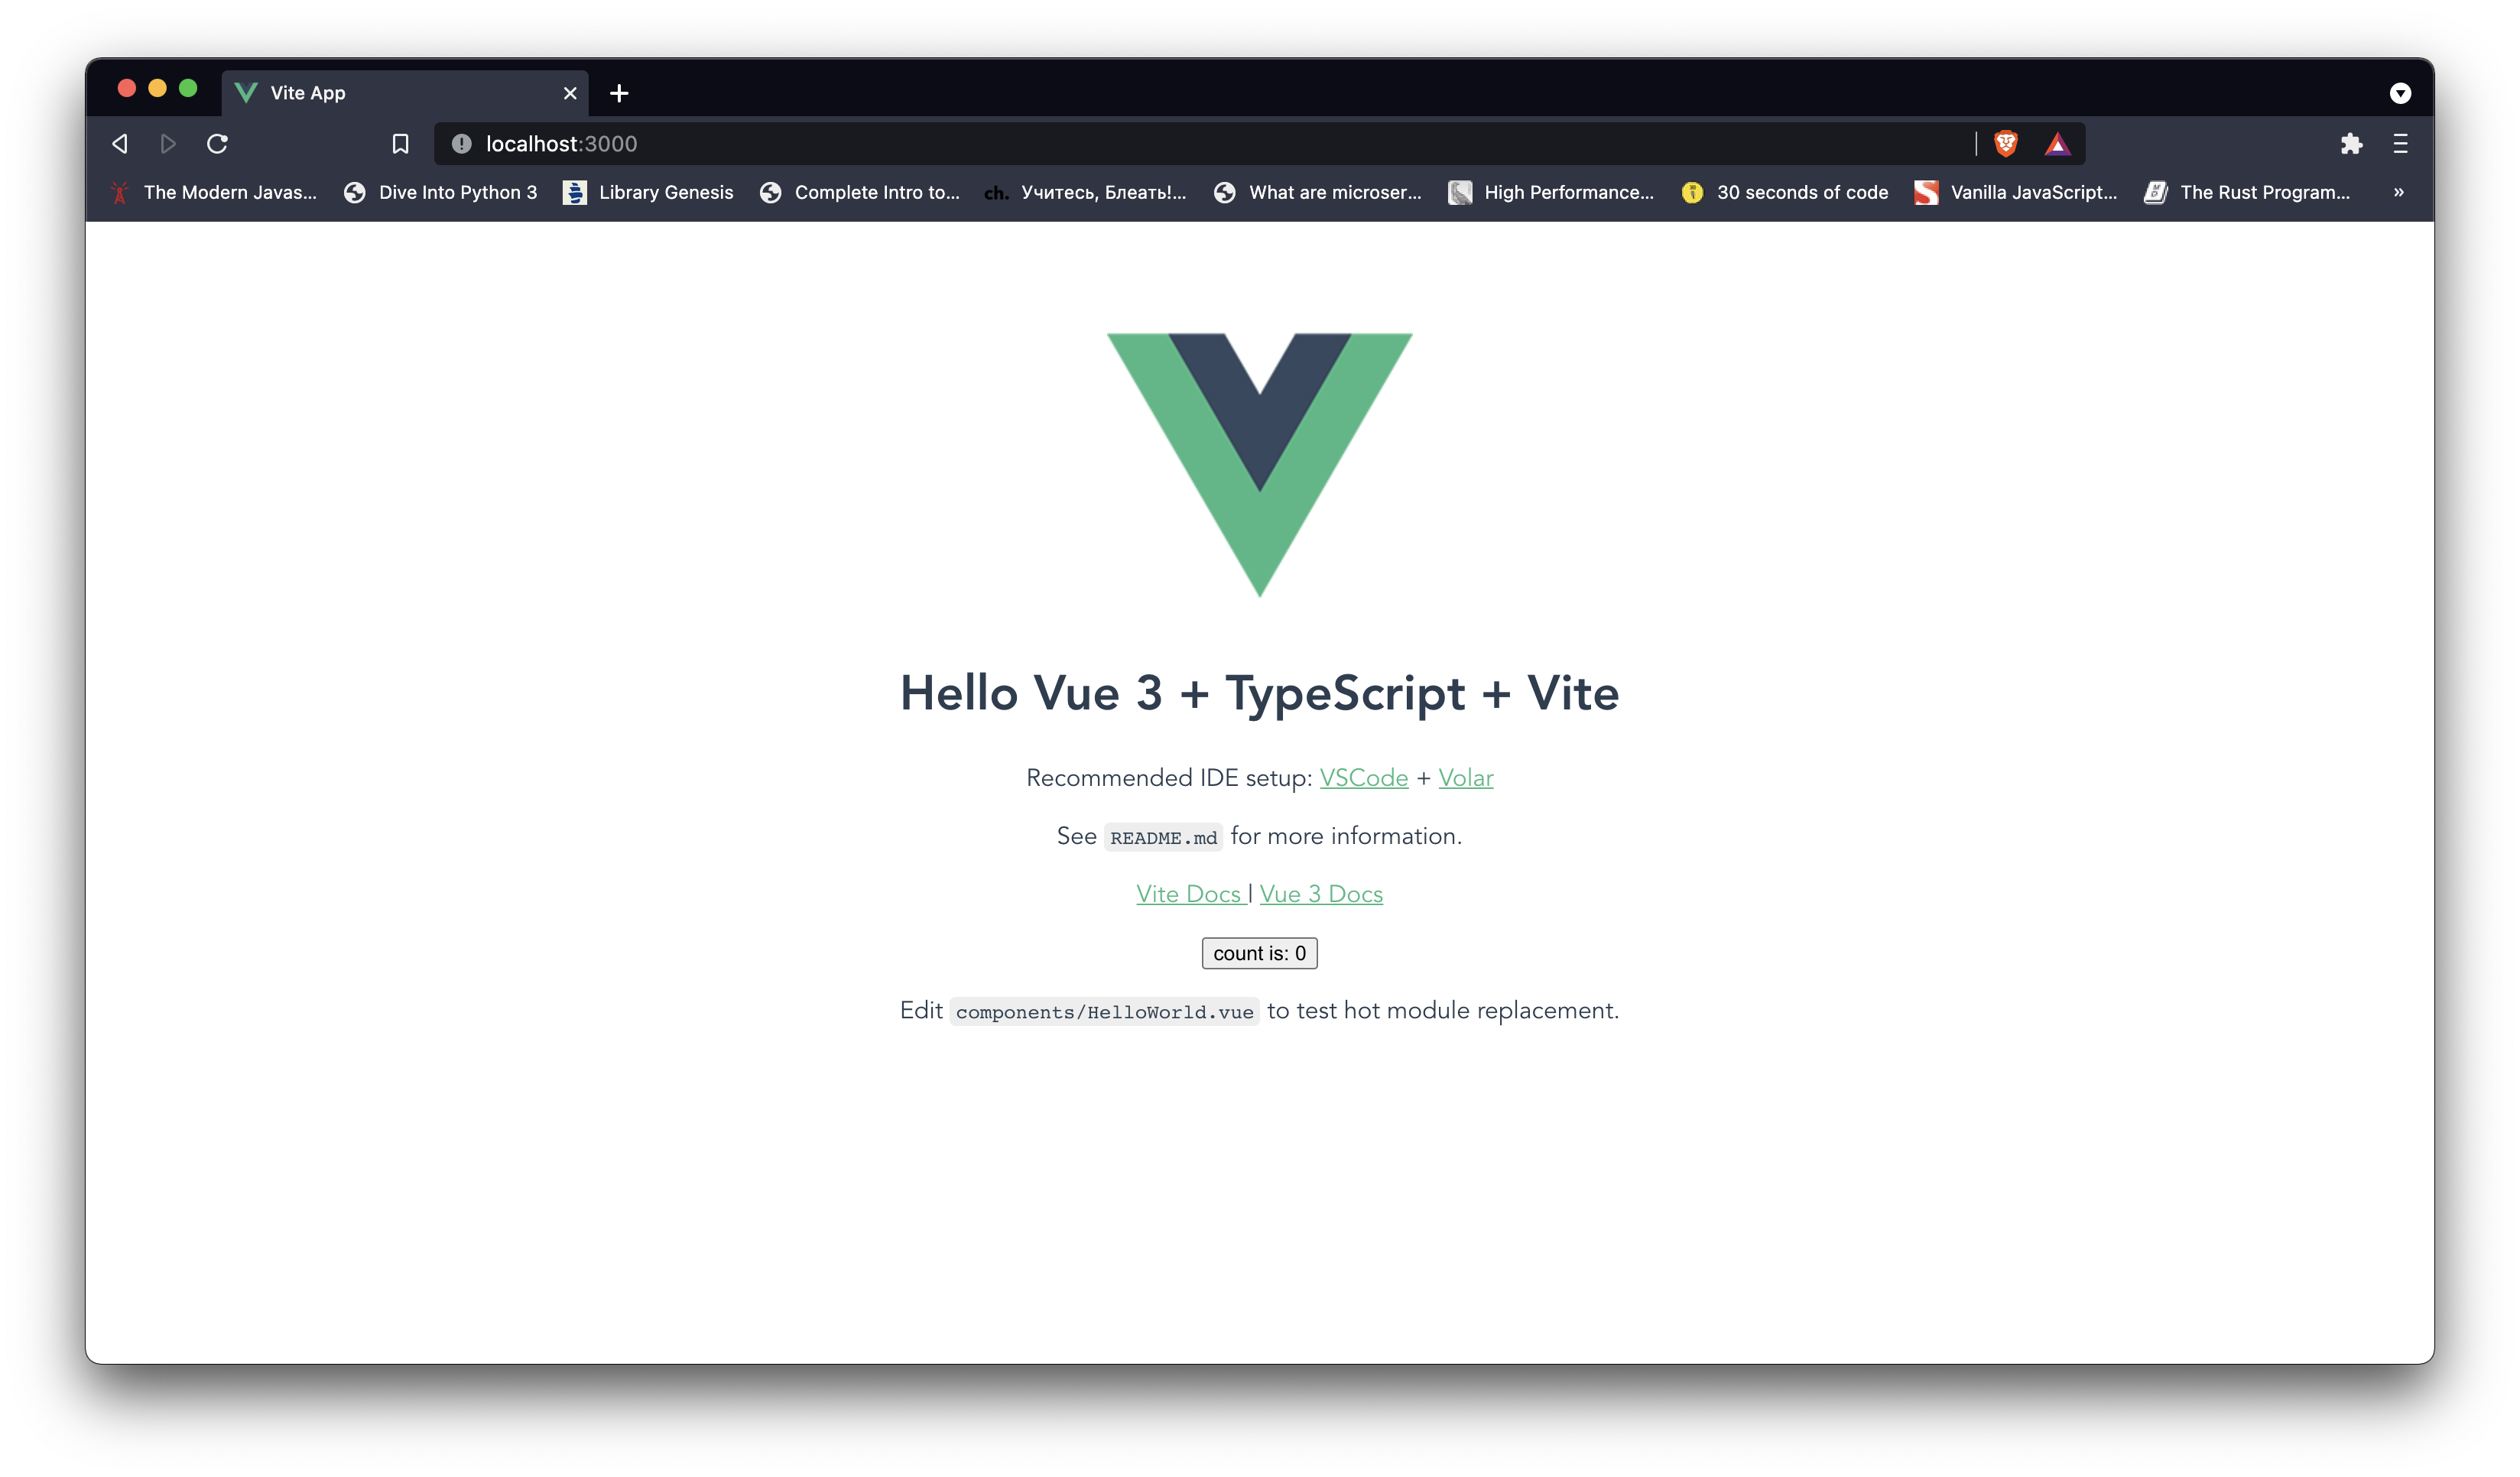
Open our new project with your editor of choice (I am using vscode1. After running npm dev open your browser and go to localhost:3000. Your screen should look like this:

Start screen

Next lets add Architect SDK to our app.

Add Architect SDK#

First let's install architect-sdk package. In your terminal add following line:

npm i architect-sdk

Then let's create .env file and add following line:2

VITE_BASE_URL=https://<your_app_id>.essentialz.cloud

Then inside src folder create new file architectSDKConfig.ts and paste following code:

import client, { ArchitectResource } from "architect-sdk";
export type Contact = {
id: string;
pictureUrl: string;
firstName: string;
lastName: string;
phone: string;
email: string;
};
export type ArchitectSchema = {
contact: ArchitectResource<Contact>;
};
const baseUrl = import.meta.env.VITE_BASE_URL;
if (typeof baseUrl !== "string") throw Error("Bad base url parameter");
export const architectSDK = client<ArchitectSchema>({
baseUrl,
});

First we imported our package and ArchitectResource. We defined types Contact and ArchitectSchema. Then we imported VITE_BASE_URL that we defined earlier in .env file. Finally we initialized Architect SDK by passing baseUrl and ArchitectSchema and exported it.

Global styles#

We will have some css that we want to share across all components. To so that we first need to create style.css file inside src/assets folder. Then we will define some style

.form-field {
display: flex;
flex-direction: column;
gap: 3px;
width: 100%;
}
.form-field > label {
font-size: 14px;
padding-left: 5px;
}
.form-field > input {
border: 1px solid rgb(216, 216, 216);
border-radius: 5px;
height: 30px;
}
.form-field > input::placeholder {
font-family: Arial, Helvetica, sans-serif;
font-size: 12px;
text-indent: 5px;
}
.btn {
height: 35px;
min-width: 120px;
border-radius: 4px;
border: none;
cursor: pointer;
font-size: 14px;
}
.btn:disabled {
background-color: rgb(74, 74, 243, 0.1);
cursor: default;
}
.btn-purple {
background-color: rgb(74, 74, 243);
color: white;
}
.btn-white {
background-color: whitesmoke;
color: gray;
border: 1px solid gainsboro;
}
.btn-danger {
background-color: rgb(219, 77, 77);
color: white;
}

Then inside main.ts add following line

import "./assets/style.css";

main.ts should now look like this

import { createApp } from "vue";
import App from "./App.vue";
import "./assets/style.css";
createApp(App).mount("#app");

Now lets create some components

Components#

Our app will have three pages:

  1. Login page - for user login
  2. Contact list page - for displaying list of contacts
  3. Contact form - for updating and creating contacts

Let's create them. Inside components create three new files Login.vue, ContactForm.vue and ContactList.vue. Inside Login.vue add following line:

<template>Login works</template>

Inside ContactForm.vue put:

<template>Contact form works</template>

And finally add

<template>Contact list</template>

to ContactList.vue.

Now go to App.vue and remove import HelloWorld from './components/HelloWorld.vue and instead add this three lines:

import ContactForm from "./components/ContactForm.vue";
import ContactList from "./components/ContactList.vue";
import Login from "./components/Login.vue";

Delete everything between template tags add instead these line:

<template>
<div>
<ContactForm />
</div>
<div>
<ContactList />
</div>
<div>
<Login />
</div>
</template>

App.vue should now look like this

<script setup lang="ts">
// This starter template is using Vue 3 <script setup> SFCs
// Check out https://v3.vuejs.org/api/sfc-script-setup.html#sfc-script-setup
import ContactForm from "./components/ContactForm.vue";
import ContactList from "./components/ContactList.vue";
import Login from "./components/Login.vue";
</script>
<template>
<div>
<ContactForm />
</div>
<div>
<ContactList />
</div>
<div>
<Login />
</div>
</template>
<style>
#app {
font-family: Avenir, Helvetica, Arial, sans-serif;
-webkit-font-smoothing: antialiased;
-moz-osx-font-smoothing: grayscale;
text-align: center;
color: #2c3e50;
}
</style>

and localhost:3000 should now look like this:

Added components.

It makes no sense to render all three components at once .So lets add a router and render them one component for each route. We will use vue-router to achieve this.

Routing#

First install vue-router@4

npm install vue-router@4

Then inside src create new folder called router and inside that folder add a file called index.ts. Add following import statements:

import { createRouter, createWebHistory, RouteRecordRaw } from "vue-router";

Let's define routes, create router and export it. After we added all of this index.js should have following code:

import { createRouter, createWebHistory, RouteRecordRaw } from "vue-router";
import ContactForm from "../components/ContactForm.vue";
import ContactList from "../components/ContactList.vue";
import Login from "../components/Login.vue";
const routes: RouteRecordRaw[] = [
{
path: "/",
name: "Login",
component: Login,
},
{
path: "/contact-list",
name: "Contact List",
component: ContactList,
},
{
path: "/contact/:id",
name: "Edit contact",
component: ContactForm,
},
{
path: "/contact",
name: "Create contact",
component: ContactForm,
},
];
const router = createRouter({
history: createWebHistory(),
routes,
});
export default router;

First we defined routes as an array of objects. Each object has a name (we will use this later), route path (this is a path at which component will be rendered) and component (which determines which component will be rendered). So when user access / path Login component will be rendered. We then create router and export it.

Now we should register our router. In main.ts import router and register it as global like this:

createApp(App).use(router).mount("#app");

main.ts should look like this:

import { createApp } from "vue";
import App from "./App.vue";
import "./assets/style.css";
import router from "./router";
createApp(App).use(router).mount("#app");

Now go back to App.vue , remove all imports, delete everything inside template tags and add <router-view></router-view>. App.vue should now look like this:

<script setup lang="ts"></script>
<template>
<router-view></router-view>
</template>
<style>
#app {
font-family: Avenir, Helvetica, Arial, sans-serif;
-webkit-font-smoothing: antialiased;
-moz-osx-font-smoothing: grayscale;
text-align: center;
color: #2c3e50;
margin-top: 60px;
}
</style>

Now go and check each route individually. At localhost:3000 you should see Login works. At localhost:3000/contact-list you should see Contact list works, and at localhost:3000/contact you should see Contact form works. We've added routing. Now lets make our components do something more than displaying simple text data. We'll start with Login component.

Login#

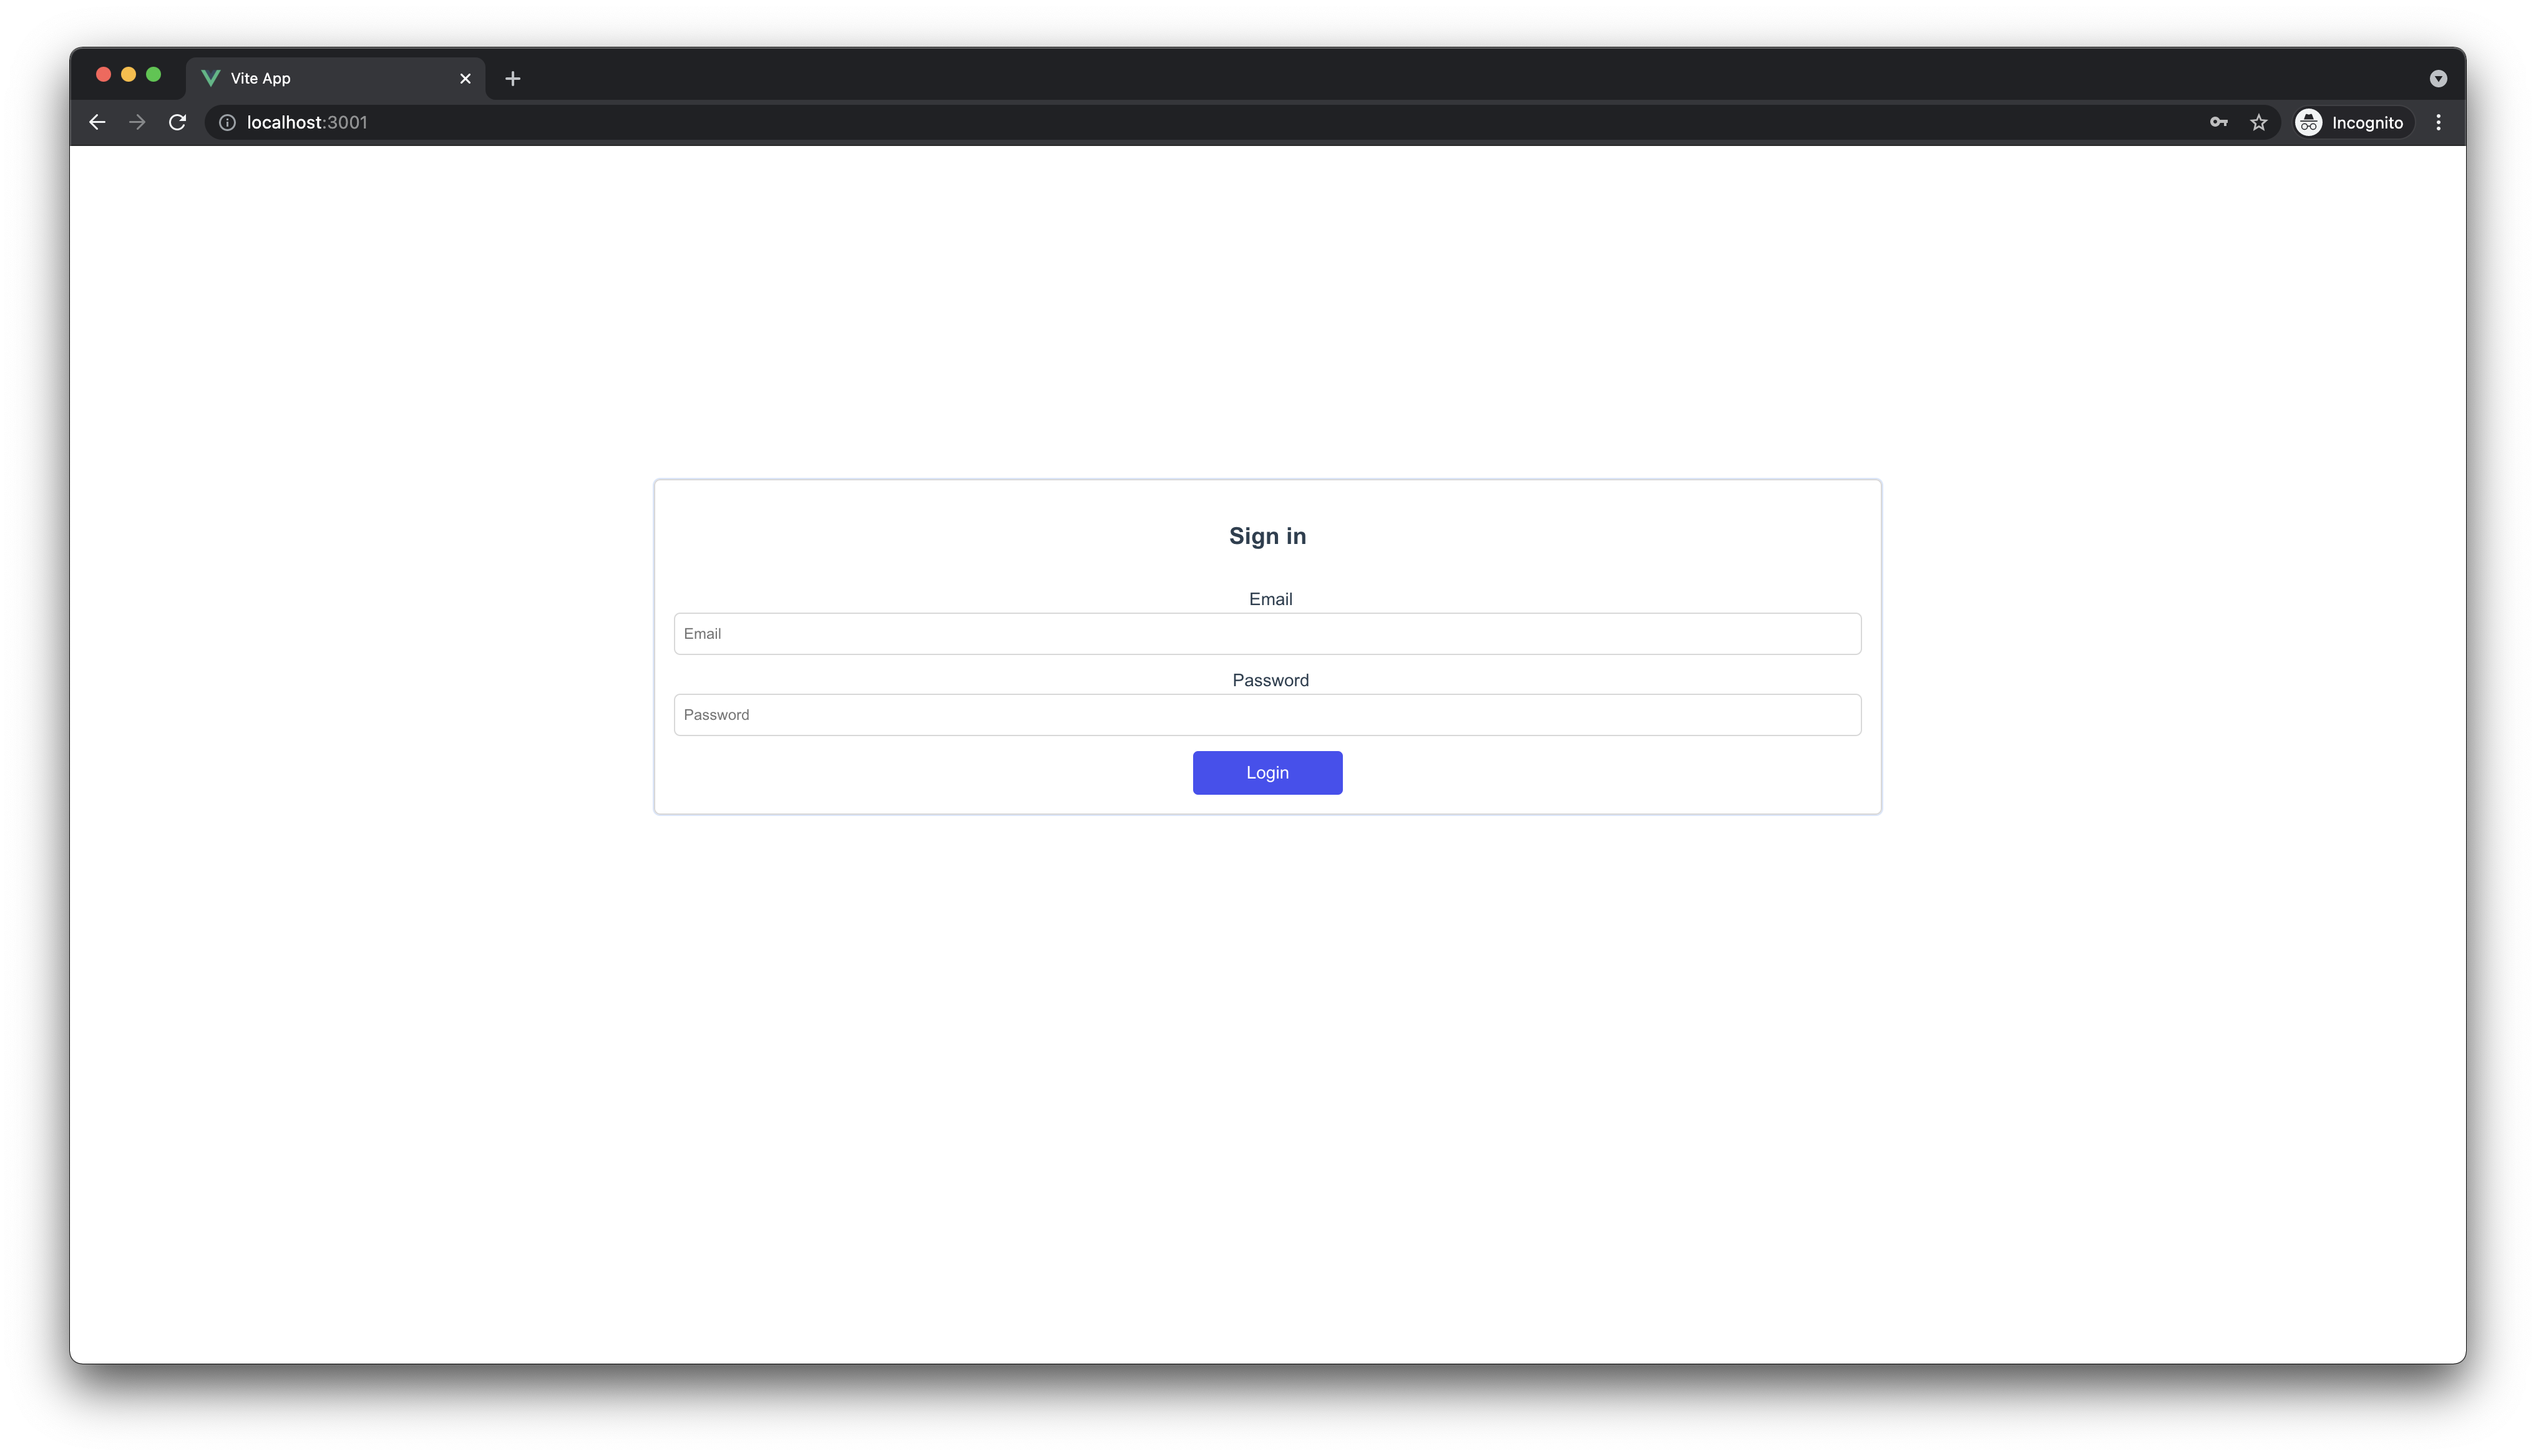
Go to Login.vue and past code below.

<script lang="ts" setup></script>
<template>
<div class="form-wrapper">
<form class="form">
<h3>Sign in</h3>
<div class="form-field">
<label>Email</label>
<input
type="email"
name="email"
id="email"
placeholder="Email"
autocomplete="email"
/>
</div>
<div class="form-field">
<label>Password</label>
<input
type="password"
name="password"
id="password"
placeholder="Password"
autocomplete="current-password"
/>
</div>
<button class="btn btn-purple">Login</button>
</form>
</div>
</template>
<style scoped>
.form-wrapper {
display: flex;
align-items: center;
justify-content: space-around;
height: 70vh;
font-family: Arial, Helvetica, sans-serif;
}
.form {
width: 50%;
min-width: 400px;
border: 1px solid rgb(216, 215, 215);
border-radius: 5px;
box-shadow: 0px 0px 0px 1px rgba(178, 204, 247, 0.5);
display: flex;
flex-direction: column;
gap: 12px;
padding: 15px;
align-items: center;
}
</style>

After saving your screen should look like this:

Login Screen

To enable login we first have to collect user input using v-model on our inputs and then use Architect SDK for authentication. For that we will use architectSDK constant we defined earlier in architectSDKConfig.ts file. Inside <script> tag add these imports:

import { ref } from "vue";
import { useRouter } from "vue-router";
import { architectSDK } from "../architectSDKConfig";

ref will be used to make variables reactive, useRouter will be used to redirect user after login, and architectSDK will be used to handle authentication. Now let's add, below imports, three new variables:

const router = useRouter();
const email = ref("");
const password = ref("");

Let's also add login method.

const login = async () => {
try {
await architectSDK.login(
{ email: email.value, password: password.value },
"email",
);
router.push("/contact-list");
} catch (e) {
console.log(e);
}
};

That is all we need to handle login. Now we need to bind email and password variables to email and password input fields by using v-model directive. When we do this whatever user type inside those input fields will be reflected in email and password variables. Bind email to email input and password to password input.

<input
type="email"
name="email"
id="email"
placeholder="Email"
autocomplete="email"
v-model="email"
/>
<input
type="password"
name="password"
id="password"
placeholder="Password"
autocomplete="current-password"
v-model="password"
/>

We also need to add submit event handling. Inside form tag add following:

<form class="form" @submit.prevent="login"></form>

On submit our login method will be called. We bind our login method using @submit directive. We also add event modifier .prevent to prevent default action (which will in this case result in page refresh).

With all this Login.vue should have following code:

<script lang="ts" setup>
import { ref } from "vue";
import { useRouter } from "vue-router";
import { architectSDK } from "../architectSDKConfig";
const router = useRouter();
const email = ref("");
const password = ref("");
const login = async () => {
try {
await architectSDK.login(
{ email: email.value, password: password.value },
"email",
);
router.push("/contact-list");
} catch (e) {
console.log(e);
}
};
</script>
<template>
<div class="form-wrapper">
<form class="form" @submit.prevent="login">
<h3>Sign in</h3>
<div class="form-field">
<label>Email</label>
<input
type="email"
name="email"
id="email"
placeholder="Email"
autocomplete="email"
v-model="email"
/>
</div>
<div class="form-field">
<label>Password</label>
<input
type="password"
name="password"
id="password"
placeholder="Password"
autocomplete="current-password"
v-model="password"
/>
</div>
<button class="btn btn-purple">Login</button>
</form>
</div>
</template>
<style scoped>
.form-wrapper {
display: flex;
align-items: center;
justify-content: space-around;
height: 70vh;
font-family: Arial, Helvetica, sans-serif;
}
.form {
width: 50%;
min-width: 400px;
border: 1px solid rgb(216, 215, 215);
border-radius: 5px;
box-shadow: 0px 0px 0px 1px rgba(178, 204, 247, 0.5);
display: flex;
flex-direction: column;
gap: 12px;
padding: 15px;
align-items: center;
}
</style>

Let's try our code now. Type your credentials3 and click Login. If everything is ok you should be redirected to /contact-list.
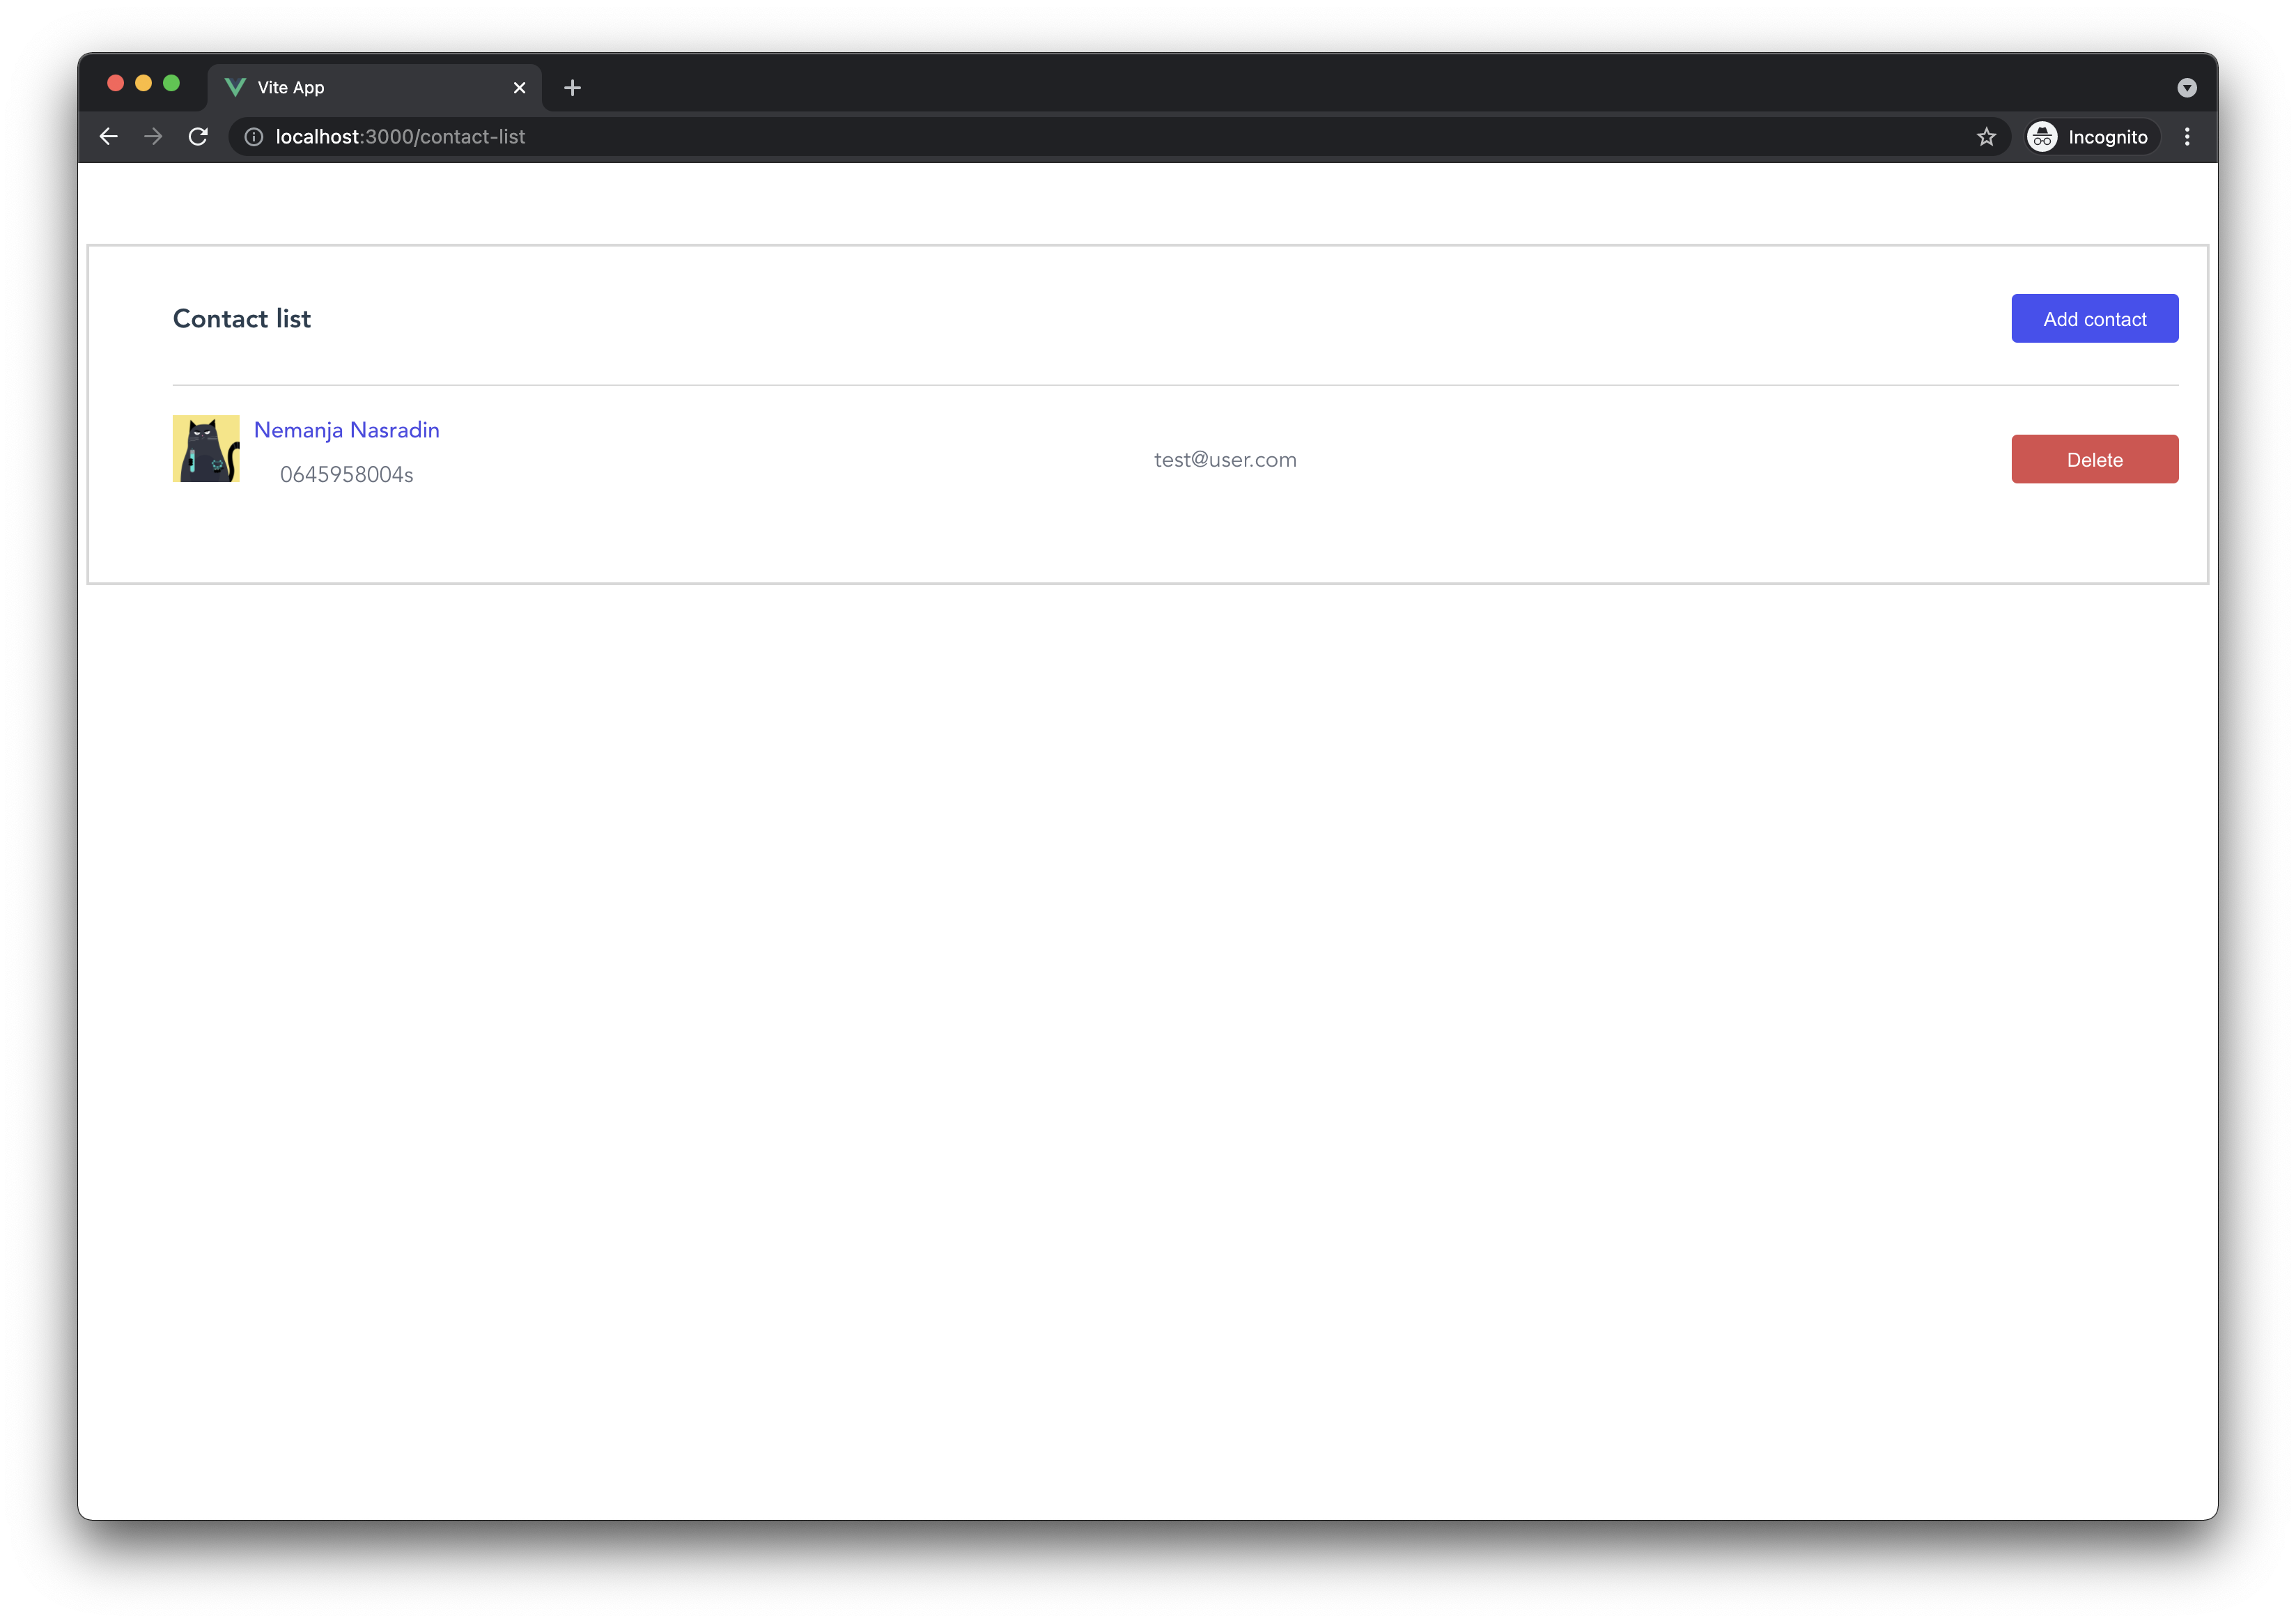
Contact list#

We want to be able to display, add, remove and edit contacts. In Contact List component we will fetch all contacts, display them, enable contact deleting and routing to Contact Form component where we will handle actual contact editing and creating. First let's add some styles and markup. Delete everything inside ContactList.vue file and paste code below:

<script lang="ts" setup></script>
<template>
<div class="wrapper">
<div class="list-header">
<h3>Contact list</h3>
<router-link to="/contact">
<button class="btn btn-purple">Add contact</button>
</router-link>
</div>
<ul>
<li>
<div class="info">
<img width="48" height="48" />
<div class="personal-info">
<div class="purple-text"></div>
<div class="gray-text"></div>
</div>
</div>
<div class="gray-text"></div>
<div>
<button class="btn btn-danger">Delete</button>
</div>
</li>
</ul>
</div>
</template>
<style scoped>
.wrapper {
padding: 20px;
box-shadow: 0 0 0 2px rgb(216, 216, 216);
margin: auto;
}
.list-header {
display: flex;
align-items: center;
justify-content: space-between;
padding-inline-start: 40px;
}
ul {
list-style-type: none;
}
li {
display: flex;
align-items: center;
justify-content: space-between;
height: 85px;
border-top: 1px solid rgb(216, 216, 216);
padding: 10px 0;
cursor: pointer;
}
.info {
display: inline-flex;
gap: 10px;
}
.personal-info > div {
margin-bottom: 10px;
}
.purple-text {
color: rgb(79, 70, 229);
font-weight: 500;
}
.gray-text {
color: rgb(107, 114, 128);
}
</style>

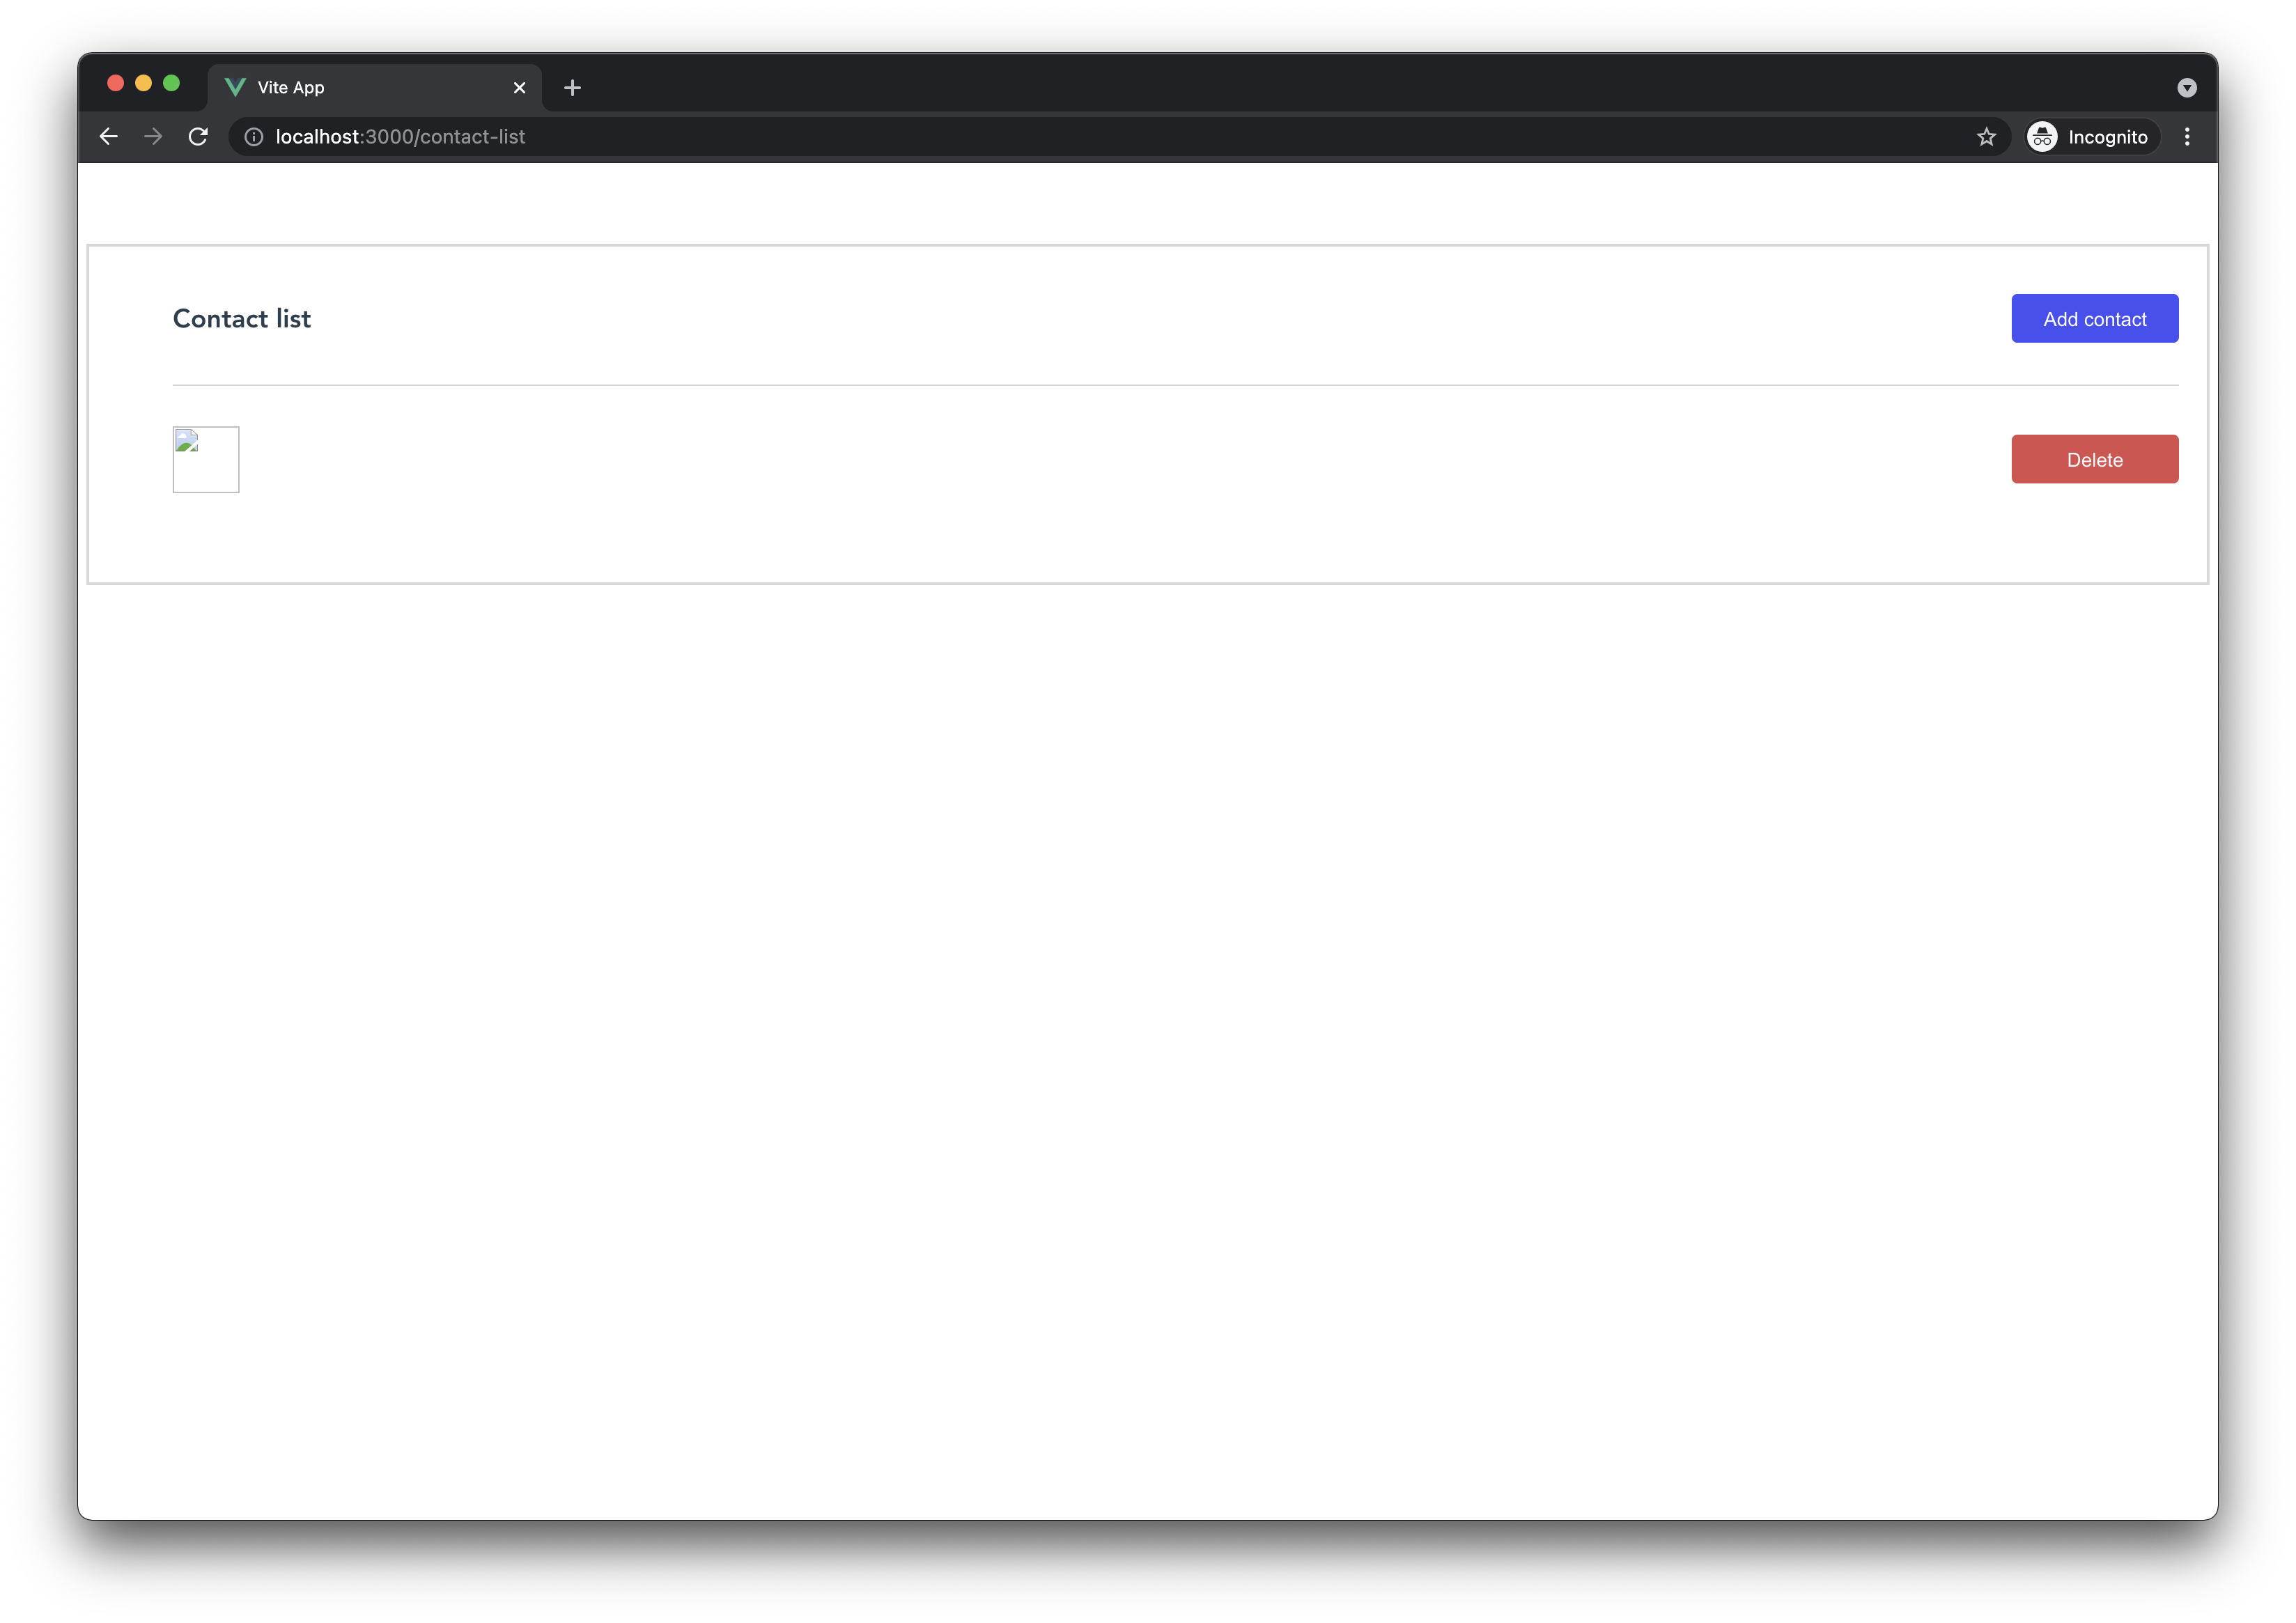
Notice that we added router-link with to="/contact". This will navigate user to contact form. After we pasted everything you should see something like this:

Contact list

Add following imports inside <script> tags.

import { ref, onMounted } from "vue";
import { useRouter } from "vue-router";
import { architectSDK, Contact } from "../architectSDKConfig";

We seen all of this except Contact, which is a type and onMounted, which is a lifecycle hook that is called when the bound element's parent component is mounted. We will use onMounted to fetch all contacts. First let's define contacts to store our contacts and router for routing.

const contacts = ref<Contact[]>([]);
const router = useRouter();

We pass Contact type to type contacts correctly. Let's define function that will handle contacts fetching and updating our contacts variable.

const getContacts = async () => {
try {
contacts.value = await architectSDK.contact.getAll();
} catch (e) {
console.log(e);
}
};

It is important to notice that we don't assign to contacts directly but through value property of contact. This is because contact is not an array but an object whose value property is an array. Next we will define method that handles contact deletion.

const deleteContact = async (id: string) => {
try {
await architectSDK.contact.delete(id);
contacts.value = contacts.value.filter((contact) => contact.id !== id);
} catch (e) {
console.log(e);
}
};

Here we first delete contact using architectSDK then, if we are successful ,remove that contact from contacts array and assign to contact (through value property) filtered values. We will also define one more method that routes user to contact form.

const editContact = (id: string) => router.push("/contact/" + id);

We need to call getContacts method in mounted lifecycle. We do this by giving onMounted function getContacts as argument.

onMounted(getContacts);

We now have everything we need to make our component work. To iterate over contact list we need to use v-for directive. Inside <li> tag add this chunk of code:

<li
v-for="contact of contacts"
:key="contact.id"
@click="editContact(contact.id)"
></li>

We iterated over contacts array using v-for directive, added :key attribute and binned @click event to editContact method and passed that method contact.id parameter. We will now interpolate contact data by using double curly bracers {{ }}. We will also bind img src attribute and only show image if our contact has one. After all of this li tag look like this:

<li
v-for="contact of contacts"
:key="contact.id"
@click="editContact(contact.id)"
>
<div class="info">
<img
v-if="contact.pictureUrl"
:src="contact.pictureUrl"
width="48"
height="48"
/>
<div class="personal-info">
<div class="purple-text">
{{ contact.firstName }} {{ contact.lastName }}
</div>
<div class="gray-text">{{ contact.phone }}</div>
</div>
</div>
<div class="gray-text">{{ contact.email }}</div>
<div>
<button class="btn btn-danger">Delete</button>
</div>
</li>

We also need to add deleteContact method to handle delete. On button with class btn btn-danger register deleteContact like this:

<button class="btn btn-danger" @click.stop="deleteContact(contact.id)">
Delete
</button>

We also added stop event modifier that stops event propagation. If we didn't then on every click on delete button will also trigger editContact handler through event bubbling.

With all we added our code should now look like this:

<script lang="ts" setup>
import { ref, onMounted } from "vue";
import { useRouter } from "vue-router";
import { architectSDK, Contact } from "../architectSDKConfig";
const contacts = ref<Contact[]>([]);
const router = useRouter();
const getContacts = async () => {
try {
contacts.value = await architectSDK.contact.getAll();
} catch (e) {
console.log(e);
}
};
const deleteContact = async (id: string) => {
try {
await architectSDK.contact.delete(id);
contacts.value = contacts.value.filter((contact) => contact.id !== id);
} catch (e) {
console.log(e);
}
};
const editContact = (id: string) => router.push("/contact/" + id);
onMounted(getContacts);
</script>
<template>
<div class="wrapper">
<div class="list-header">
<h3>Contact list</h3>
<router-link to="/contact">
<button class="btn btn-purple">Add contact</button>
</router-link>
</div>
<ul>
<li
v-for="contact of contacts"
:key="contact.id"
@click="editContact(contact.id)"
>
<div class="info">
<img
v-if="contact.pictureUrl"
:src="contact.pictureUrl"
width="48"
height="48"
/>
<div class="personal-info">
<div class="purple-text">
{{ contact.firstName }} {{ contact.lastName }}
</div>
<div class="gray-text">{{ contact.phone }}</div>
</div>
</div>
<div class="gray-text">{{ contact.email }}</div>
<div>
<button
class="btn btn-danger"
@click.stop="deleteContact(contact.id)"
>
Delete
</button>
</div>
</li>
</ul>
</div>
</template>
<style scoped>
.wrapper {
padding: 20px;
box-shadow: 0 0 0 2px rgb(216, 216, 216);
margin: auto;
}
.list-header {
display: flex;
align-items: center;
justify-content: space-between;
padding-inline-start: 40px;
}
ul {
list-style-type: none;
}
li {
display: flex;
align-items: center;
justify-content: space-between;
height: 85px;
border-top: 1px solid rgb(216, 216, 216);
padding: 10px 0;
cursor: pointer;
}
.info {
display: inline-flex;
gap: 10px;
}
.personal-info > div {
margin-bottom: 10px;
}
.purple-text {
color: rgb(79, 70, 229);
font-weight: 500;
}
.gray-text {
color: rgb(107, 114, 128);
}
</style>

Contacts (if we have them) should be listed. My screen look like this (yours may not look the same if ,for example, someone else is used our open api) Contact Screen end

Now we should start working on contact form.

Contact From#

As always let's start by adding some styles and markup. Go to ContactForm.vue delete everything in it and paste:

<script lang="ts" setup></script>
<template>
<div class="contact-wrapper">
<div class="header">
<h3>Title</h3>
</div>
<div class="form-wrapper">
<form>
<div class="form-field">
<label for="firstName">First name</label>
<input type="text" name="firstName" id="firstName" />
</div>
<div class="form-field">
<label for="lastName">Last name</label>
<input type="text" name="lastName" id="lastName" />
</div>
<div class="form-field">
<label for="phone">Phone</label>
<input type="text" name="phone" id="phone" />
</div>
<div class="form-field">
<label for="email">Email</label>
<input type="text" name="email" id="email" />
</div>
<div class="file-wrapper">
<img width="48" height="48" />
<label class="file-label" for="file">
You can use <span>JPG or PNG</span> file
<input
type="file"
class="file-input"
accept=".jpg, .jpeg, .png"
name="file"
id="file"
/>
</label>
</div>
<div class="form-footer">
<button class="btn btn-white">Discard</button>
<button class="btn btn-purple" type="submit">Submit</button>
</div>
</form>
</div>
</div>
</template>
<style scoped>
.contact-wrapper {
padding: 20px;
margin: auto;
box-shadow: 0px 0px 0px 1px rgba(178, 204, 247, 0.5);
border: 1px solid rgb(216, 215, 215);
}
.header {
margin-bottom: 35px;
}
form {
display: flex;
flex-direction: column;
align-items: center;
gap: 15px;
}
.file-wrapper {
height: 90px;
border: 1px dashed rgb(209, 213, 219);
margin: 20px 0;
width: 100%;
display: flex;
flex-direction: column;
align-items: center;
justify-content: space-around;
}
.file-label {
cursor: pointer;
color: rgb(74, 74, 243);
}
input[type="file"] {
height: 0;
width: 0;
}
.form-footer {
display: flex;
justify-content: flex-end;
gap: 25px;
width: 80%;
}
</style>

You should see this:

Contact start

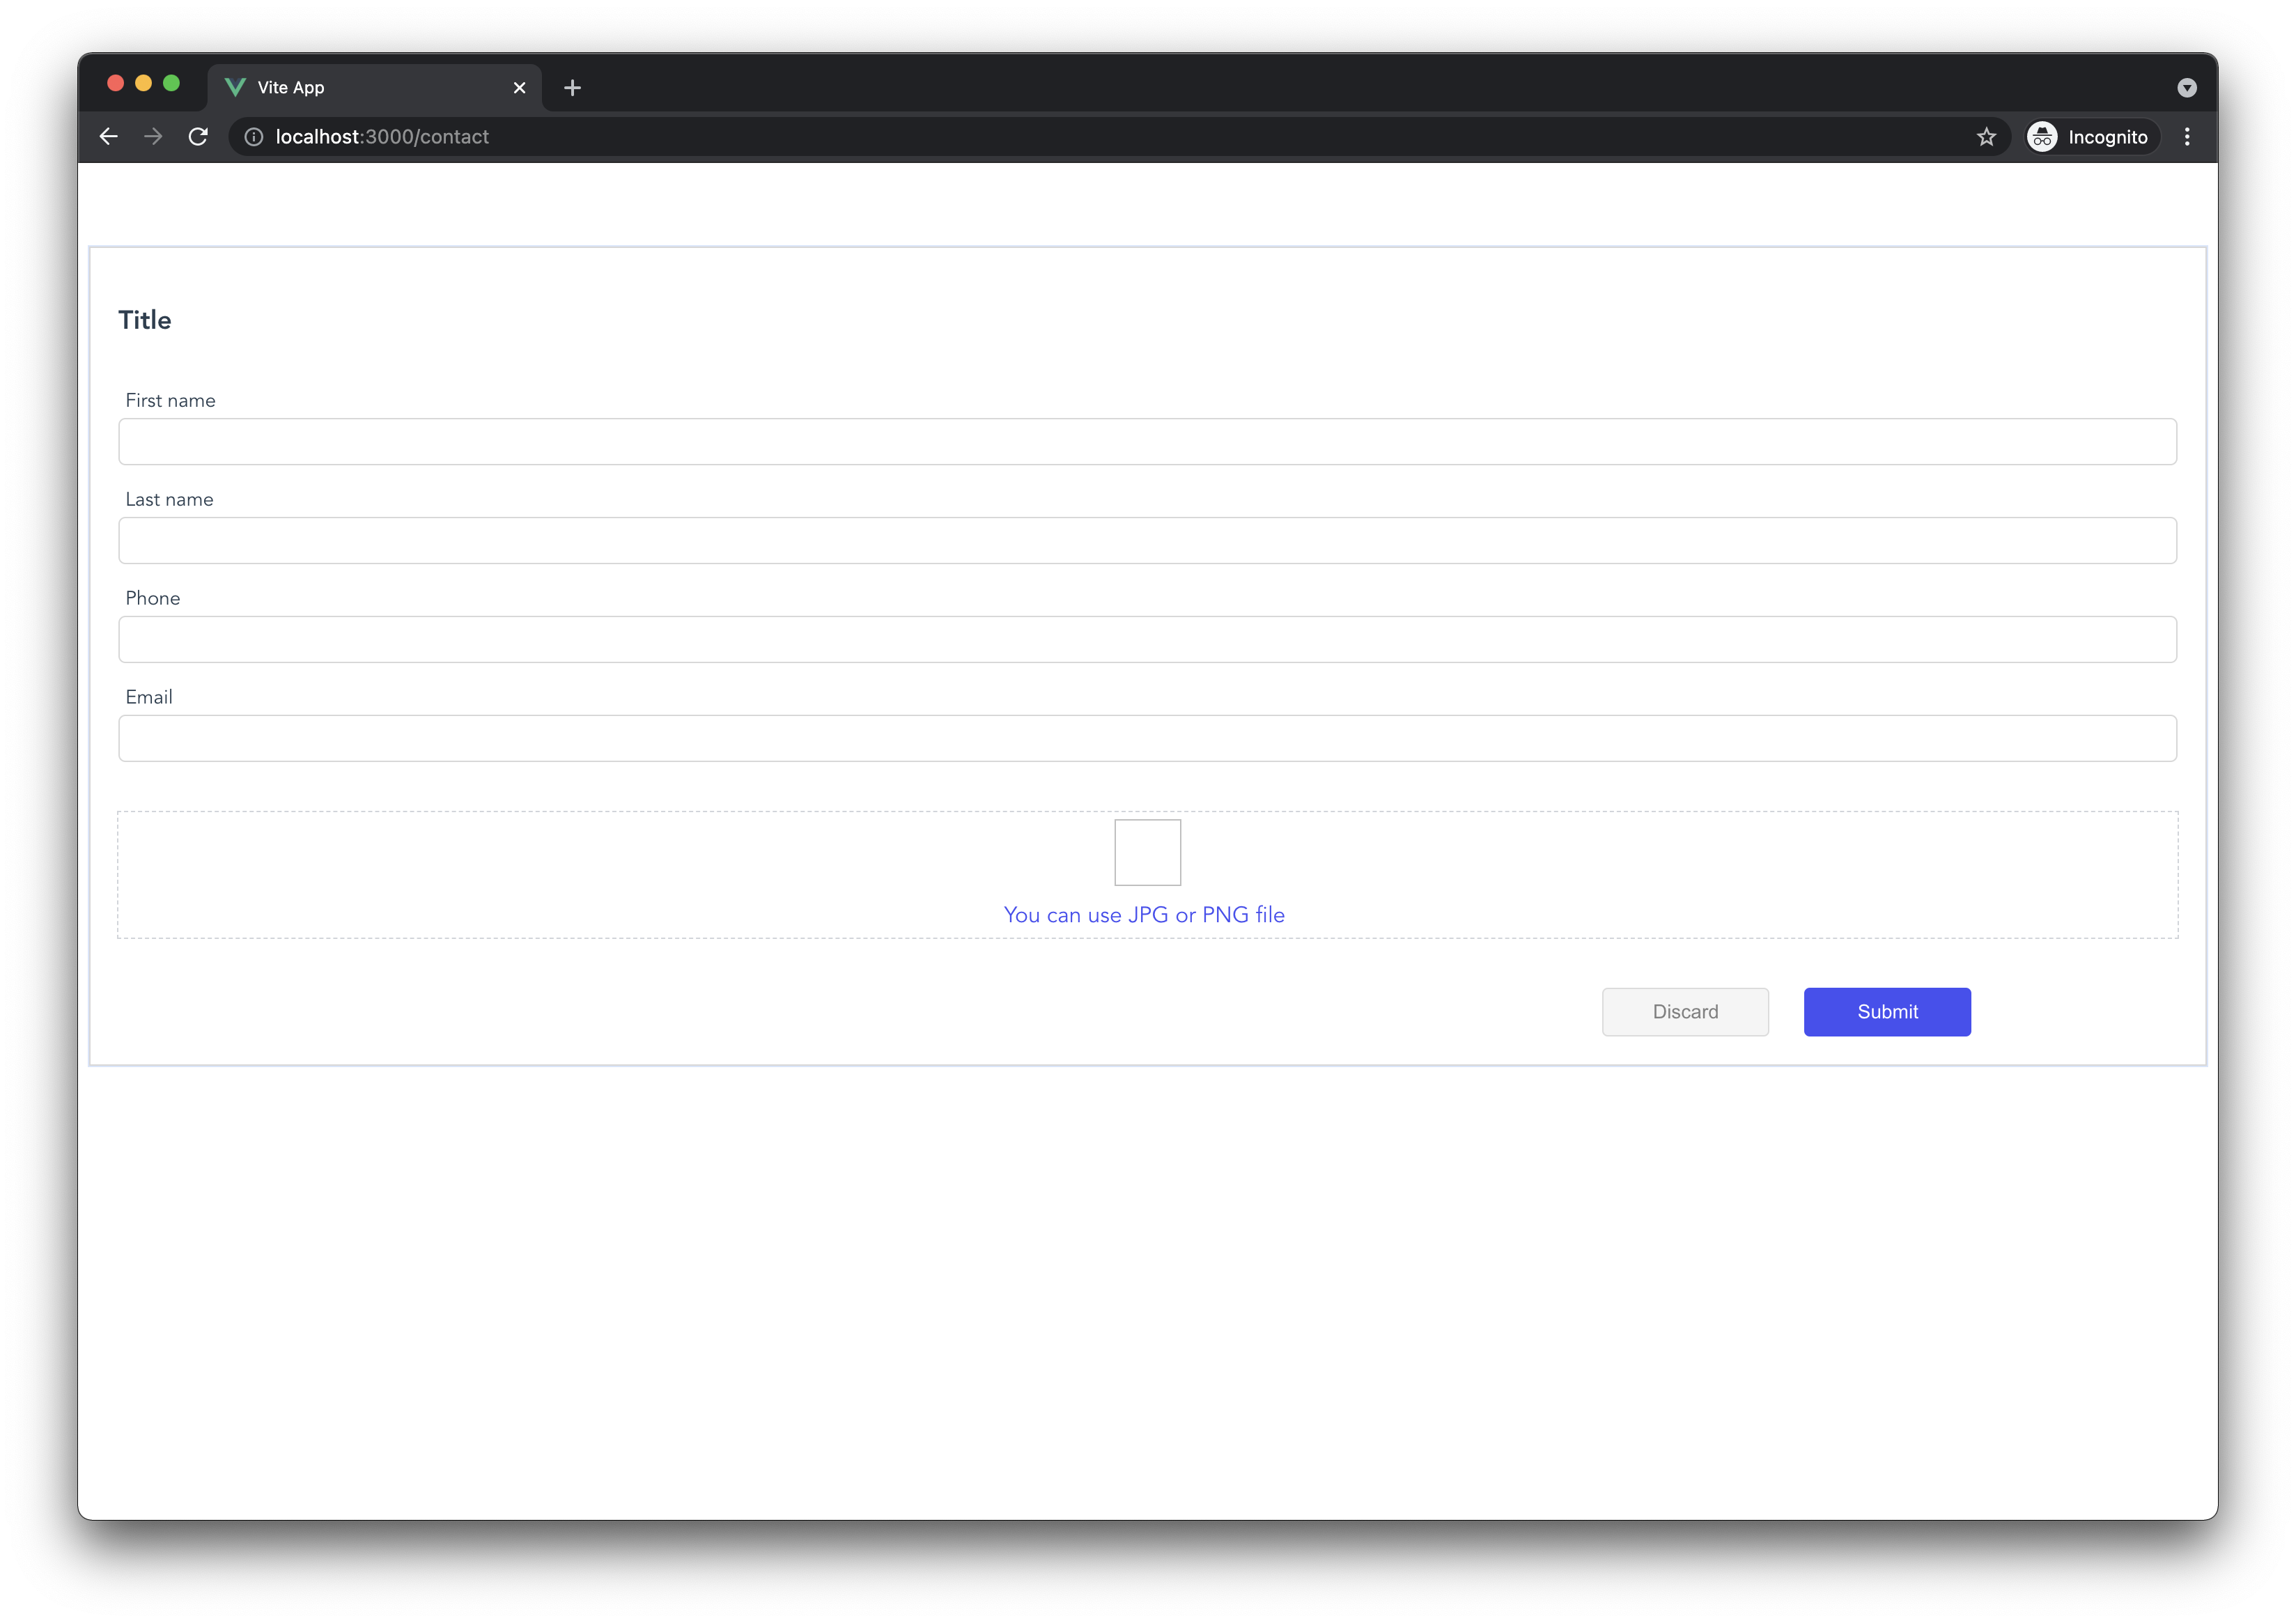
We have a from with a couple of fields in it. 4 inputs are of type text and one is of type file. We will use this form for both updating and creating users. If the url is of without parameter /contact, we will create contact and if it has parameter /contact/id we will update it. First add following imports in <script> tag:

import { useRoute, useRouter } from "vue-router";
import { ref, computed, onMounted } from "vue";
import { architectSDK, Contact } from "../architectSDKConfig";

Then we will define a couple of variables:

const route = useRoute();
const router = useRouter();
const firstName = ref("");
const lastName = ref("");
const phone = ref("");
const email = ref("");
const pictureUrl = ref("");
const file = ref<File | undefined>(undefined);

We will use route to parse id parameter, router for navigation, firstName, lastName, phone, email and file to store user input. pictureUrl is the url of contact image.

We will also define computed property. Whenever user choose image file we will create new url representing blob object using createObjectURL and then show url to the user.

const image = computed(() => {
if (image.value) {
URL.revokeObjectURL(image.value);
}
if (file.value) {
return URL.createObjectURL(file.value);
}
});

We first check if image.value has some value (which is a URL representing blob object) and revoke that object and then check if file has a value and if it does we use URL.createObjectURL that returns string. Keep in mind that everything returned from function passed to computed will become a new value for image. This function will trigger whenever file.value changes.

Next we define file input handler:

const handleFileChange = (e: Event) => {
file.value = (e.target as HTMLInputElement)?.files?.[0];
};

When user clicks on discard button we will just navigate him to /contact-list:

const discard = () => router.push("/contact-list");

To get contact we will use this method:

const getContact = async () => {
const id = route.params.id;
if (id && typeof id === "string") {
try {
const contact = await architectSDK.contact.get(id);
firstName.value = contact.firstName;
lastName.value = contact.lastName;
phone.value = contact.phone;
email.value = contact.email;
pictureUrl.value = contact.pictureUrl;
} catch (e) {
console.log(e);
}
}
};

We first get route parameter. And if parameter is not null ( typeof id === "string" is added as type guard since id type can be string || string[] ) we get the contact by calling get method on architectSDK and update variables we defined earlier. We will call this method inside onMounted function (during mounted lifecycle).

onMounted(getContact);

Now we need to handle submit event. We will call this method handleSubmit:

const handleSubmit = async () => {
const newContact = {
firstName: firstName.value,
lastName: lastName.value,
phone: phone.value,
email: email.value,
} as Contact;
try {
if (file.value) {
const { url } = await architectSDK.files.upload(file.value);
newContact.pictureUrl = url;
}
if (route.params.id && typeof route.params.id === "string") {
await architectSDK.contact.update(route.params.id, newContact);
} else {
await architectSDK.contact.create(newContact);
}
router.push("/contact-list");
} catch (e) {
console.log(e);
}
};

There are a couple of steps here so let's explain them. First we collect all user input (except file) and store it inside object. Then we check if file is defined and if it is we upload it. We receive back an object with url (which is a url of our image) prop. After we take that prop, using destructuring, we monkey patch it to newContact object as pictureUrl prop. Then we check if there is route parameter id and if it is we call update method on architectSDK and if there it is not we call create method. After we have done all of that we navigate user to /contact-list.

We have everything we need to make our page functional. We only need to bind everything to template. After we do that this is what should we get:

<form @submit.prevent.stop="handleSubmit">
<div class="form-field">
<label for="firstName">First name</label>
<input type="text" name="firstName" id="firstName" v-model="firstName" />
</div>
<div class="form-field">
<label for="lastName">Last name</label>
<input type="text" name="lastName" id="lastName" v-model="lastName" />
</div>
<div class="form-field">
<label for="phone">Phone</label>
<input type="text" name="phone" id="phone" v-model="phone" />
</div>
<div class="form-field">
<label for="email">Email</label>
<input type="text" name="email" id="email" v-model="email" />
</div>
<div class="file-wrapper">
<img
width="48"
height="48"
v-if="image || pictureUrl"
:src="image || pictureUrl"
/>
<label class="file-label" for="file">
You can use <span>JPG or PNG</span> file
<input
type="file"
class="file-input"
accept=".jpg, .jpeg, .png"
name="file"
id="file"
@change="handleFileChange"
/>
</label>
</div>
<div class="form-footer">
<button class="btn btn-white" @click="discard">Discard</button>
<button class="btn btn-purple" type="submit">Submit</button>
</div>
</form>

Let's add one contact and check if everything is working.4

Filled out form

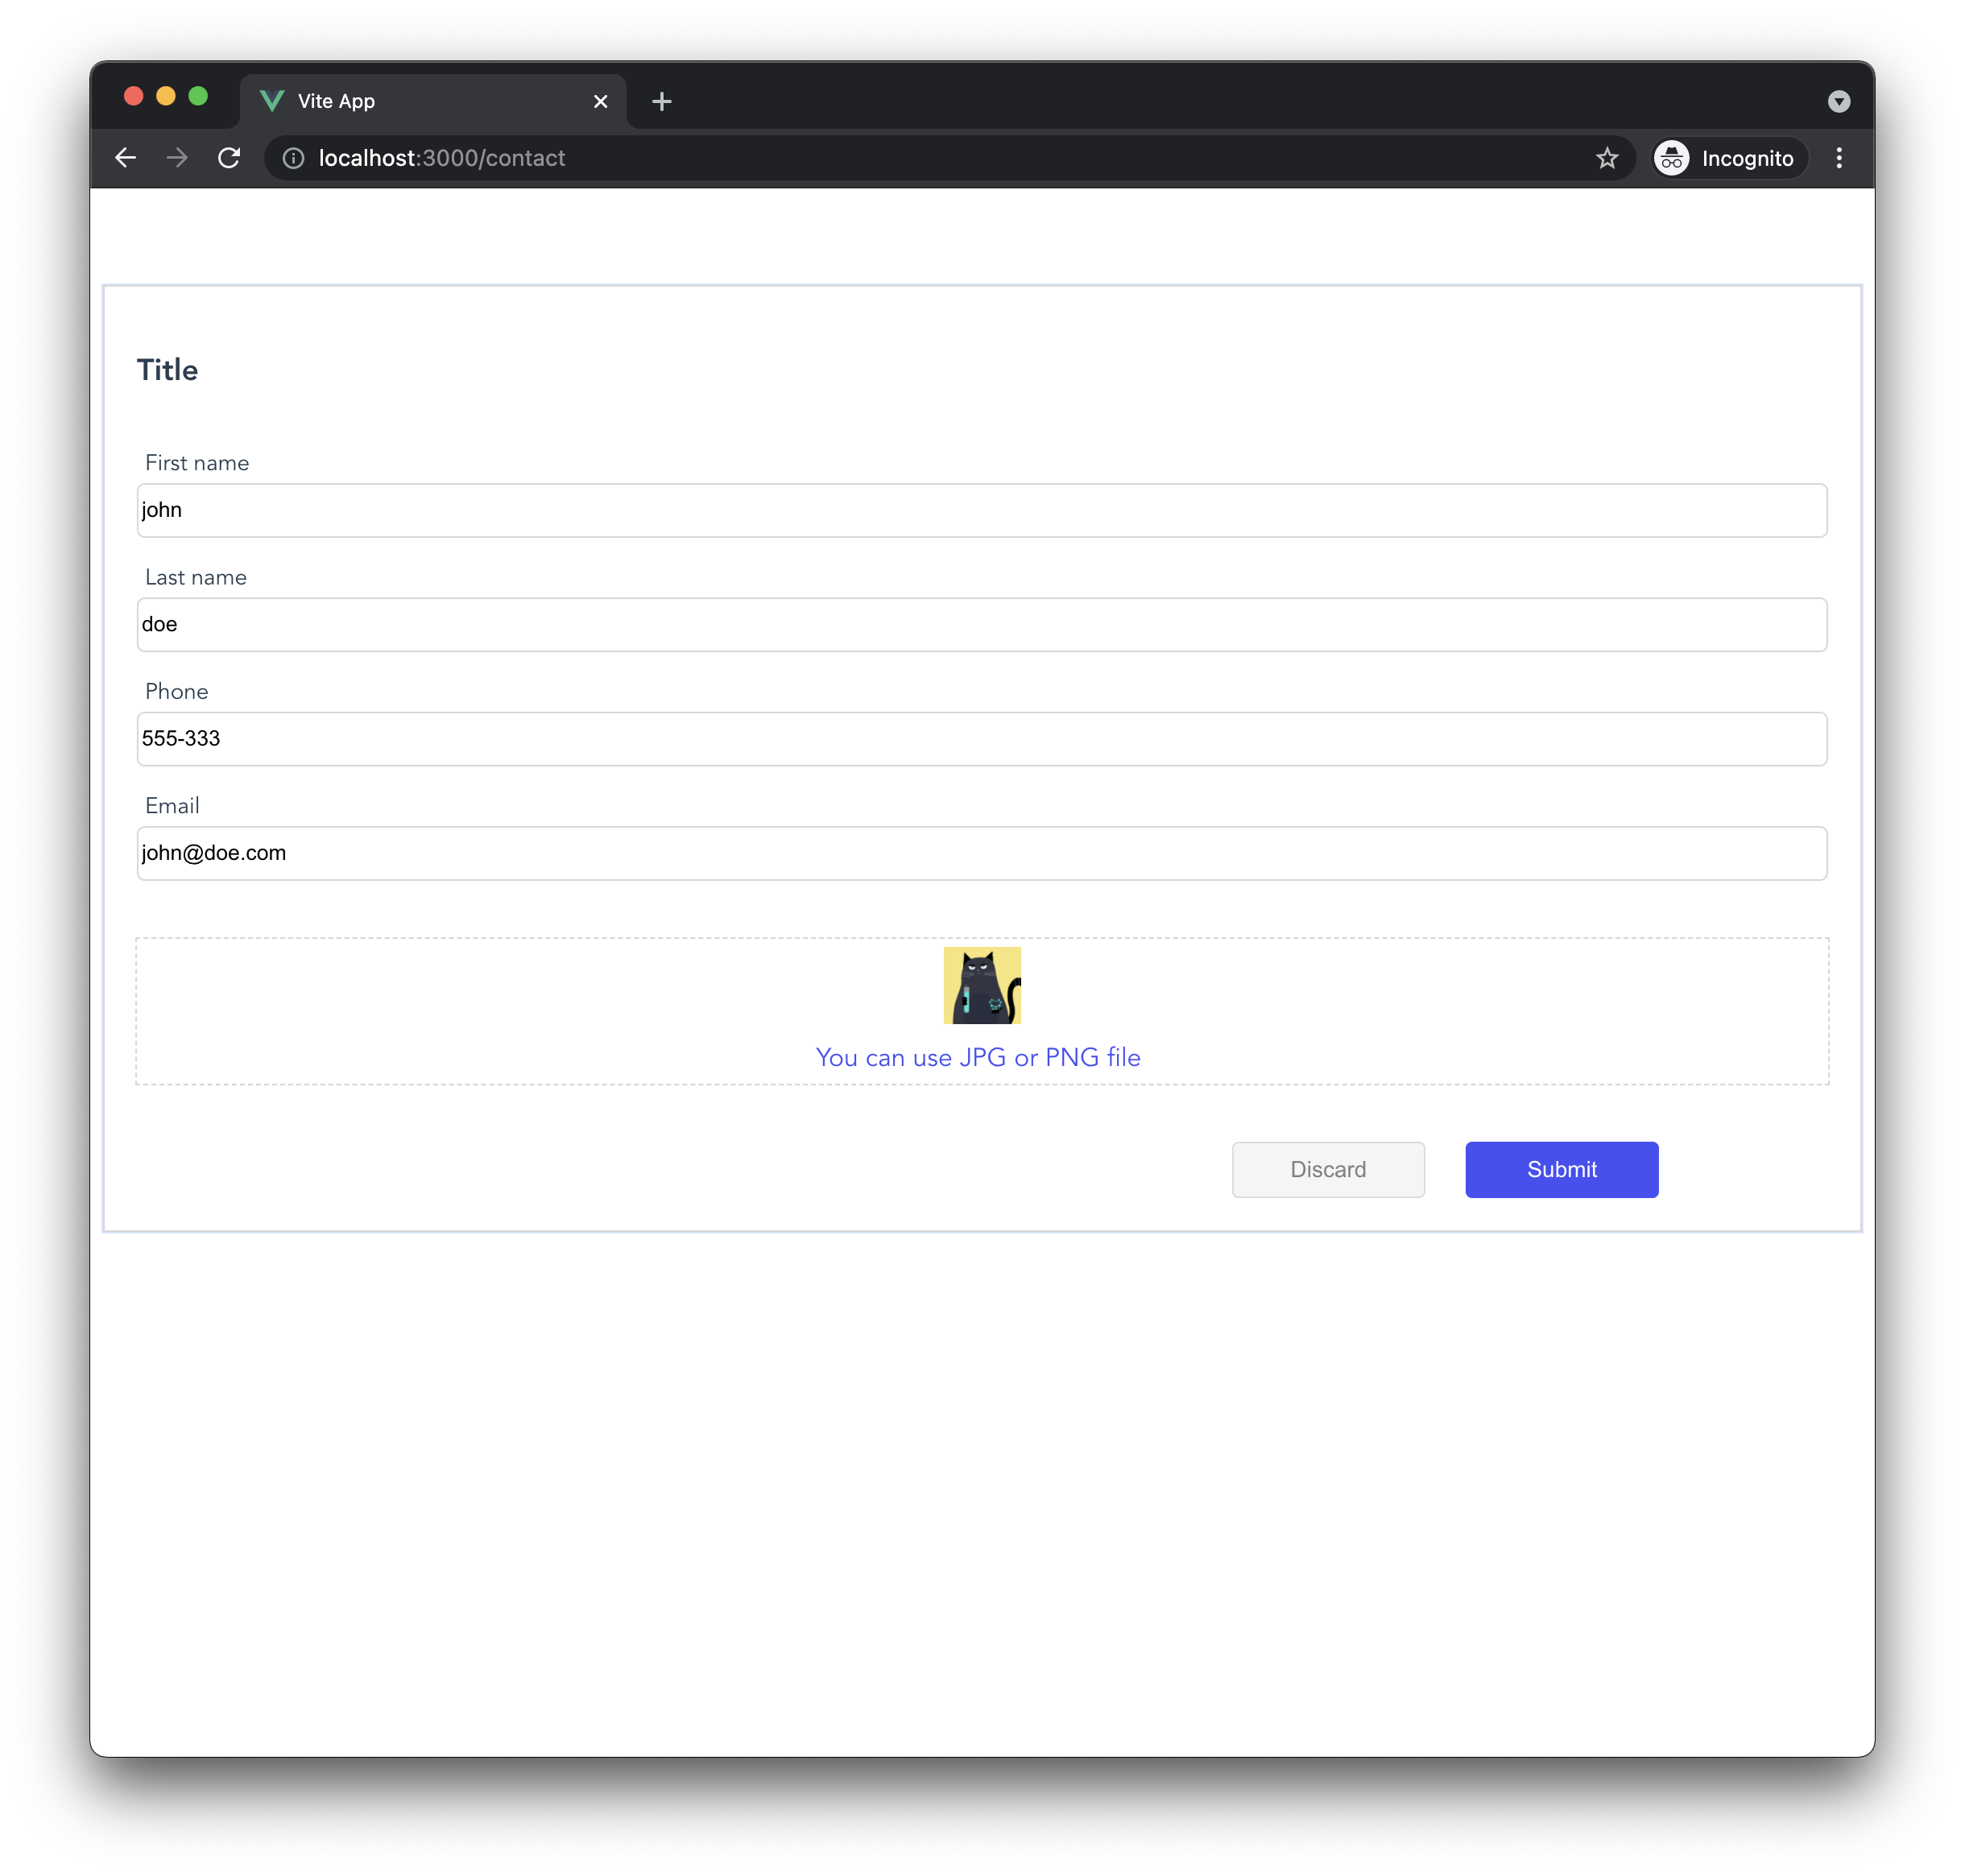
After that I am navigated to /contact-list, where my contact is show. By clicking on contact item (anywhere but on delete button) you should be navigated to the same form but this time everything should fill up with data you defined earlier. Play around a bit to get a feeling how our app works. With all our code ContactForm looks like this:

<script lang="ts" setup>
import { useRoute, useRouter } from "vue-router";
import { ref, computed, onMounted } from "vue";
import { architectSDK, Contact } from "../architectSDKConfig";
const route = useRoute();
const router = useRouter();
const firstName = ref("");
const lastName = ref("");
const phone = ref("");
const email = ref("");
const pictureUrl = ref("");
const file = ref<File | undefined>(undefined);
const image = computed(() => {
if (image.value) {
URL.revokeObjectURL(image.value);
}
if (file.value) {
return URL.createObjectURL(file.value);
}
});
const handleFileChange = (e: Event) => {
file.value = (e.target as HTMLInputElement)?.files?.[0];
};
const discard = () => router.push("/contact-list");
const getContact = async () => {
const id = route.params.id;
if (id && typeof id === "string") {
try {
const contact = await architectSDK.contact.get(id);
firstName.value = contact.firstName;
lastName.value = contact.lastName;
phone.value = contact.phone;
email.value = contact.email;
pictureUrl.value = contact.pictureUrl;
} catch (e) {
console.log(e);
}
}
};
onMounted(getContact);
const handleSubmit = async () => {
const newContact = {
firstName: firstName.value,
lastName: lastName.value,
phone: phone.value,
email: email.value,
} as Contact;
try {
if (file.value) {
const { url } = await architectSDK.files.upload(file.value);
newContact.pictureUrl = url;
}
if (route.params.id && typeof route.params.id === "string") {
await architectSDK.contact.update(route.params.id, newContact);
} else {
await architectSDK.contact.create(newContact);
}
router.push("/contact-list");
} catch (e) {
console.log(e);
}
};
</script>
<template>
<div class="contact-wrapper">
<div class="header">
<h3>Title</h3>
</div>
<div class="form-wrapper">
<form @submit.prevent.stop="handleSubmit">
<div class="form-field">
<label for="firstName">First name</label>
<input
type="text"
name="firstName"
id="firstName"
v-model="firstName"
/>
</div>
<div class="form-field">
<label for="lastName">Last name</label>
<input type="text" name="lastName" id="lastName" v-model="lastName" />
</div>
<div class="form-field">
<label for="phone">Phone</label>
<input type="text" name="phone" id="phone" v-model="phone" />
</div>
<div class="form-field">
<label for="email">Email</label>
<input type="text" name="email" id="email" v-model="email" />
</div>
<div class="file-wrapper">
<img
width="48"
height="48"
v-if="image || pictureUrl"
:src="image || pictureUrl"
/>
<label class="file-label" for="file">
You can use <span>JPG or PNG</span> file
<input
type="file"
class="file-input"
accept=".jpg, .jpeg, .png"
name="file"
id="file"
@change="handleFileChange"
/>
</label>
</div>
<div class="form-footer">
<button class="btn btn-white" @click="discard">Discard</button>
<button class="btn btn-purple" type="submit">Submit</button>
</div>
</form>
</div>
</div>
</template>
<style scoped>
.contact-wrapper {
padding: 20px;
margin: auto;
box-shadow: 0px 0px 0px 1px rgba(178, 204, 247, 0.5);
border: 1px solid rgb(216, 215, 215);
}
.header {
margin-bottom: 35px;
}
form {
display: flex;
flex-direction: column;
align-items: center;
gap: 15px;
}
.file-wrapper {
height: 90px;
border: 1px dashed rgb(209, 213, 219);
margin: 20px 0;
width: 100%;
display: flex;
flex-direction: column;
align-items: center;
justify-content: space-around;
}
.file-label {
cursor: pointer;
color: rgb(74, 74, 243);
}
input[type="file"] {
height: 0;
width: 0;
}
.form-footer {
display: flex;
justify-content: flex-end;
gap: 25px;
width: 80%;
}
</style>

Let's also add a header component which we will use for logout.

Header#

Let's add a header that will handle logout. Inside component directory create a new file called Header.vue. Inside that file we will have following code:

<script lang="ts" setup>
import { useRouter } from "vue-router";
import { architectSDK } from "../architectSDKConfig";
const router = useRouter();
const logout = async () => {
try {
await architectSDK.logout();
router.push("/");
} catch (e) {
console.log(e);
}
};
</script>
<template>
<div class="header">
<button @click="logout" class="btn btn-purple">Logout</button>
</div>
</template>
<style scoped>
.header {
display: flex;
align-items: center;
justify-content: flex-end;
padding: 20px 10px;
}
</style>

Here we have some markup and styles, and inside script we imported userRouter and architectSDK. In logout method we first logout user using architectSDK and then we navigate the user back to login screen. Now only thing that is left to do is to import and render Header component.

Inside ContactForm.vue import Header component:

import Header from "./Header.vue";

and render it by putting it just bellow opening <template> tag:

<template>
<Header />

Do the same for ContactList.vue. Click logout button to see if it works. It should navigate you to login screen.

Only thing that is left for us are route guards.

Route guards#

We don't want unauthorized user to access /contact-list or /contact route. We also don't want for user to access root route (/) unless he has logged out. To achieve this behavior we need to implement route guards. We will use beforeEnter hook which is called before resolve completes. beforeEnter is a function that accept three arguments to, which is a route to which user is navigating, from route from which user is coming from and next which is a function that need to be called for navigation to continue.

Let's add guards to our router. Go to routes/index.ts file and import architectSDK.

import { architectSDK } from "../architectSDKConfig";

We will use isAuthenticated method that is available on architectSDK object. Now inside first object in routes array (with path /), add this function:

beforeEnter: (to, from, next) => {
if (architectSDK.isAuthenticated()) {
next({
name: "Contact List",
});
} else {
next();
}
};

This function check if user is authenticated and if he is he will be redirected to route whose name is Contact List (ContactList component), but if he isn't route will resolve as expected.

For all other components we want opposite, if user is authenticated route will resolve, and if he isn't he will be redirected to Login component. This function should be added to all route objects but first one (login route object)

beforeEnter: (to, from, next) => {
if (architectSDK.isAuthenticated()) {
next();
} else {
next({ name: "Login" });
}
};

After all our changes routes/index.ts should look like this:

import { createRouter, createWebHistory, RouteRecordRaw } from "vue-router";
import ContactForm from "../components/ContactForm.vue";
import ContactList from "../components/ContactList.vue";
import Login from "../components/Login.vue";
import { architectSDK } from "../architectSDKConfig";
const routes: RouteRecordRaw[] = [
{
path: "/",
name: "Login",
component: Login,
beforeEnter: (to, from, next) => {
if (architectSDK.isAuthenticated()) {
next({
name: "Contact List",
});
} else {
next();
}
},
},
{
path: "/contact-list",
name: "Contact List",
component: ContactList,
beforeEnter: (to, from, next) => {
if (architectSDK.isAuthenticated()) {
next();
} else {
next({ name: "Login" });
}
},
},
{
path: "/contact/:id",
name: "Edit contact",
component: ContactForm,
beforeEnter: (to, from, next) => {
if (architectSDK.isAuthenticated()) {
next();
} else {
next({ name: "Login" });
}
},
},
{
path: "/contact",
name: "Create contact",
component: ContactForm,
beforeEnter: (to, from, next) => {
if (architectSDK.isAuthenticated()) {
next();
} else {
next({ name: "Login" });
}
},
},
];
const router = createRouter({
history: createWebHistory(),
routes,
});
export default router;

All our routes are protected. Play around a bit to check if everything is working. Try login out and the accessing ContactForm and ContactList components.

Conclusion#

We have created fully functional (although simple) application in Vue in no time by utilizing powerful Architect SDK for handling all backend heavy lifting and enabling us to focus only on frontend logic and beautiful UI.


  1. If you are using VsCode be sure to install [Volar][https://marketplace.visualstudio.com/items?itemname=johnsoncodehk.volar]↩
  2. In case you don't have an account you can use https://architect_demo.essentialz.cloud.This domain is free and is used for demonstration purposes.↩
  3. If you don't have an account you can use nikola@essentialz.io for email and architectdemo2021 for password.↩
  4. If the text is not properly aligned be sure to remove text-align: center by deleting it in App.vue (in style tag in #app selector)↩